

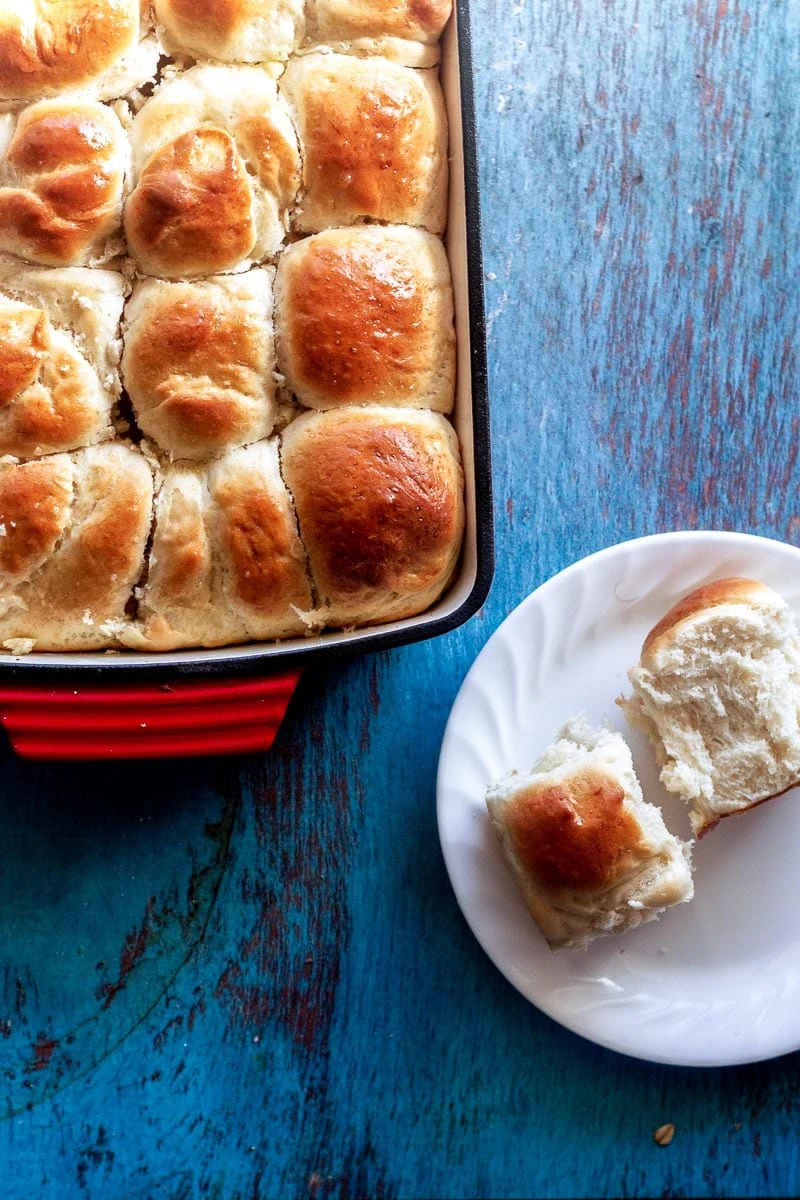
These perfect dinner rolls are soft, buttery, melt-in-your-mouth delicious, and so easy to make! They are perfect for your holiday table, Sunday supper, or any time you're craving fluffy, rich dinner rolls.

I love baking homemade bread. One, because it's therapeutic. Two, because it's so easy. Let me tell you how many oohs and ahhs come along with a pan of buttery homemade dinner rolls: everyone with vocal cords at the table will give you serious props. And they don't even know how easy it was to put together.
Read this post to learn the who, what, where, when, and why in making the best dinner rolls period.
The ingredients are simple:
Milk. Whole milk would be best. The fats in the whole milk make the dinner rolls soft and tender. Two percent will work too, but whole milk is preferred.
Unsalted Butter. We want to control the salt in everything we do. Remember, baking is a science.
Sugar.
Active Dry Yeast. Can you use other types of yeast? Absolutely, instant yeast really doesn't need to be bloomed and rises faster, and a sourdough starter will take more time to rise but also doesn't bloom. So the times will be different using different yeast.
Kosher Salt.
Eggs.
All-Purpose Flour.
That's it. Love when a recipe has a short easy list of simple ingredients.
How to Make the Best Dinner Rolls Ever
1. Scald some whole milk.
Scalding milk is important in bread making, it breaks down the whey proteins in the milk. Whey protein can weaken the gluten in your bread dough and stop your rolls from rising! So this is a step you definitely don't want to skip.
2.Mix in the good stuff.
This is a rich dough, much like brioche. A rich dough is a dough that's full of fats: milk, eggs, butter. So in the hot milk, add the butter and sugar, give it a stir. Bonus: all the 'good stuff' also helps activate and feed your yeast, making it super foamy.

3. Mix in eggs and flour.
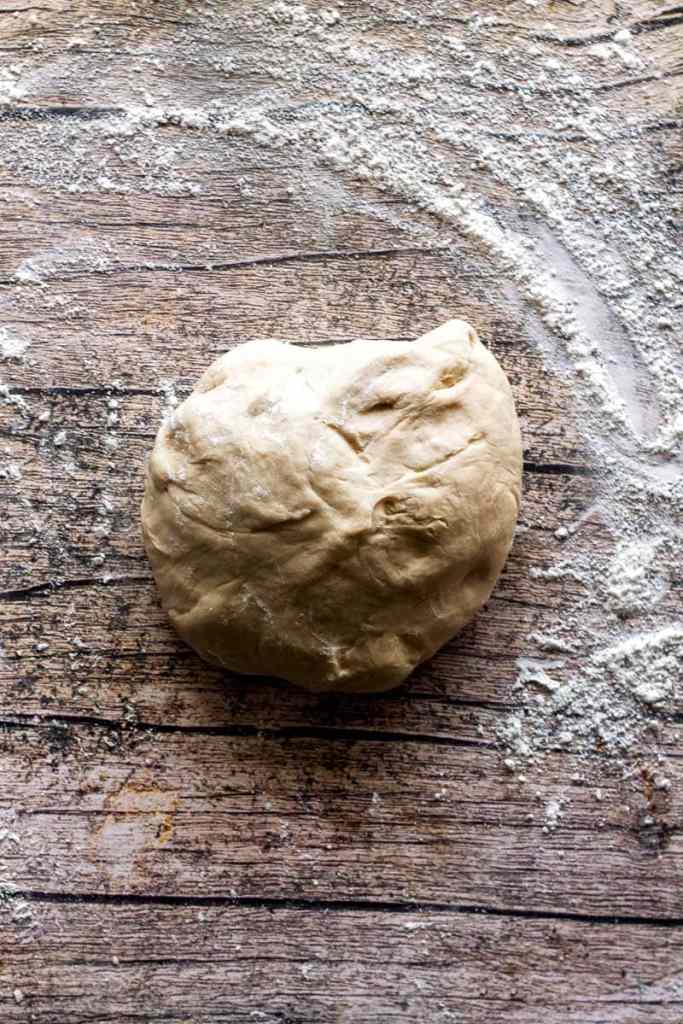
4. Knead until smooth.
I stand by my stand mixer one hundred percent when it comes to bread making. It's so easy, just let the mixer slap that dough around for five minutes, you know?

If you don't have a stand mixer (and I highly suggest that you get one! Put it on your Christmas list, honey.) you can totally knead the dough by hand. Make sure to use a lot of flour for your hands and work surface.
The end result of kneading should be a soft, squishy, not sticky dough. Maybe slightly tacky, but not sticky.
5. Get the dough in an oiled bowl, let it rise in a warm space.
Letting the dough rise is an incredibly important step. Without the gluten relaxing, we won't be able to have soft rolls. So definitely allow enough time to let the dough get a breather.
6. Punch, make into dough balls, and rise again.

Pull the dough apart into balls. they don't need to be perfect, but if you want perfectly rounded tops, stretch the dough over the top and pinch them closed at the bottom.
Let them stay in a warm space again, covered in plastic wrap, and rise for another hour.

Look at how fluffy they get! Don't let them rise too much and touch the plastic wrap, they'll deflate when you pull it off.
7. Bake until golden brown and butter down, honey.

How to Make Dinner Rolls Rise Faster
The type of yeast definitely matters when it comes to rise time. Instant and Active Dry will rise faster than a sourdough starter using wild yeast.

For my 'warm space' I will use three places:
- My oven. I turn on my oven to 200 degrees F (95 degrees C), and then turn it off after a minute. That way, the dough is in a pretty consistently warm, draftless environment.
- In my laundry room. On laundry day, your dryer is making a nice, warm environment in its room. take advantage of that by keeping your dough in there while running laundry. Double duty!
- On my porch. Now, I live in Florida, where even in the winter it's still a little warm. The sun hits my back porch in the early afternoon in the winter, so I set the dough there. Don't do this in the summer though, we want a 'warm' space, not to kill the yeast with a 'hot' space.

How to Make Yeast Rolls Ahead of Time
Another thing I completely love about these rolls is that you can make them ahead of time! Perfect for the holiday rush and perfect for those weeknights where you just don't feel like cooking but need to put a whole meal on the table.
So here's how to make them the day before:
- Make the dough, give it the first rise and shape them into the rolls.
- Place them into an oven-safe baking dish, wrap them in plastic wrap, and keep in the fridge overnight.
- The day you need to bake them, pull them out at least 3-4 hours ahead of time, and let them rise in a warm place or your kitchen counter for 1-2 hours so they can go through their second rise.
How to freeze and bake dinner rolls
- Make the dough, give it the first rise and shape them into the rolls.
- Place the rolls into a freezer and oven-safe pan, wrap with plastic wrap (those aluminum pans work so well with this) and freeze.
- Day of baking, pull out at least 5-6 hours ahead and let thaw and rise in a warm environment or on your countertop, then bake.
You can also freeze the baked dinner rolls, just warm them through in a 350 degrees F (180 degrees C) oven for about 10-15 minutes.

Jazz up your homemade Dinner Rolls
- Garlic Herb Butter. Mix 2 tablespoon melted butter with garlic powder and Italian seasoning.
- Cheesy Bacon Dinner Rolls. Mix 1 cup shredded sharp cheddar cheese and about 3 strips of cooked thick-cut bacon, chopped finely into the dough before adding all the flour.
- Honey Butter. Beat together one stick of softened butter with 1 teaspoon ground cinnamon and 2 tablespoon brown sugar with an electric mixer.
Looking for more amazing bread recipes? Check out:
Texas Roadhouse Rolls Copycat Recipe
Sister Schubert's Parker House Rolls Copycat Recipe
Sea Salt and Cracked Black Pepper Focaccia Bread
REMEMBER TO SUBSCRIBE TO SWEET TEA & THYME’S NEWSLETTER FOR FREE AND RECEIVE FRESH RECIPE NOTIFICATIONS DELIVERED INTO YOUR INBOX!
WHEN YOU MAKE THIS RECIPE, SNAP A PIC AND USE THE HASHTAG #SWEETTEAANDTHYME ON INSTAGRAM! DON’T FORGET TO GIVE A STAR RATING AND COMMENT!
FOLLOW SWEET TEA AND THYME ON FACEBOOK | INSTAGRAM | PINTEREST FOR ALL OF THE LATEST CONTENT, RECIPES AND UPDATES.

Best Dinner Rolls Recipe
Ingredients
- 1 cup 240 mL whole milk
- ½ cup 120 g granulated sugar
- ¼ cup 57 g butter, melted
- 1 ½ 8 g teaspoons salt
- 2 packages, 4 ½ teaspoon or 23 g active dry yeast
- 2 large eggs
- 4 ½-5 cups 630 g-700 g all-purpose flour, with more as needed
- 1 tablespoon 15 mL vegetable or olive oil, for brushing bowl
- 3 tablespoon 45 mL butter, melted, for brushing
Instructions
- In a small saucepan, pour in the milk and bring it to just under a simmer. The milk will be ready when there are small bubbles around the edges, not simmering and not boiling. This will happen quickly so don't leave the milk alone.
- Once the bubbles come to the edges, remove the pot from heat and stir in the sugar, butter, and kosher salt. Let the milk mixture cool until just warm, no cooler than 110 degrees F to 115 degrees F (43 degrees C to 48 degrees C).
- Once the milk mixture has cooled to temperature, pour it into your stand mixer's bowl and add the yeast. Stir gently and let the yeast bloom for 10 minutes until foamy.
- Add in eggs and two cups of flour to the bowl, and stir together with your dough hook attachment on low speed.
- Beat in remaining flour gradually on medium-low speed, about ½ cup at a time. The dough should cling together, not sticking to the bowl. If it is sticking to the bowl (this can happen if you are in a tropical climate, or if it's humid and/or rainy in your environment), add more flour a tablespoon at a time until the dough is no longer sticking to the bowl.
- Let the dough knead for 7 minutes, until the dough is soft, smooth, and springs up when you poke it.
- Oil a large bowl and place the dough into it. Brush the top of the dough with more oil then cover with plastic wrap, let rise in a warm place for 1 hour or until it's doubled in size.
- When the dough has risen, punch it down to let the air out. Divide the dough into balls, about ¼ cup size. Place each roll into a buttered 9x13-inch oven-safe baking pan. you should have 20 rolls. Cover with a clean tea towel or plastic wrap and let rise again for 1 hour or until doubled in size.
- While the dough is on its second rise, preheat the oven to 375 degrees F (190 degrees C).
- Take plastic wrap off the baking dish and bake the rolls for 20 to 23 minutes, or until golden brown on top.
- Brush tops of rolls with butter and serve warm.


Leave a Reply